Page 7 of 23
Re: TF Race Car Build
Posted: Mon May 02, 2016 8:15 pm
by flyingbanana
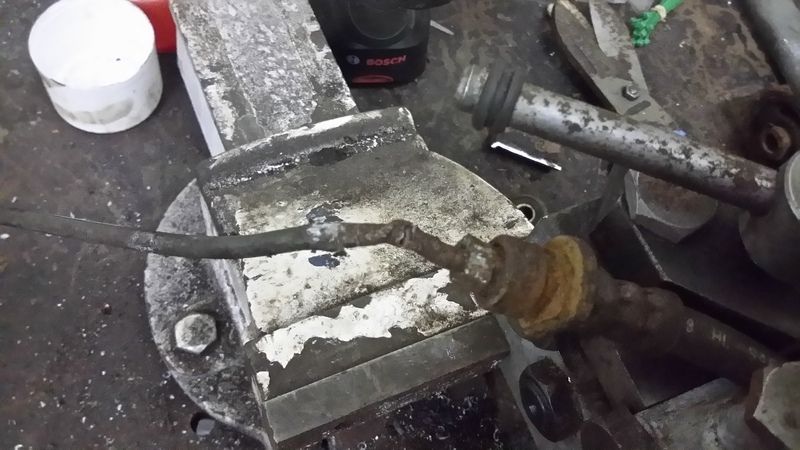
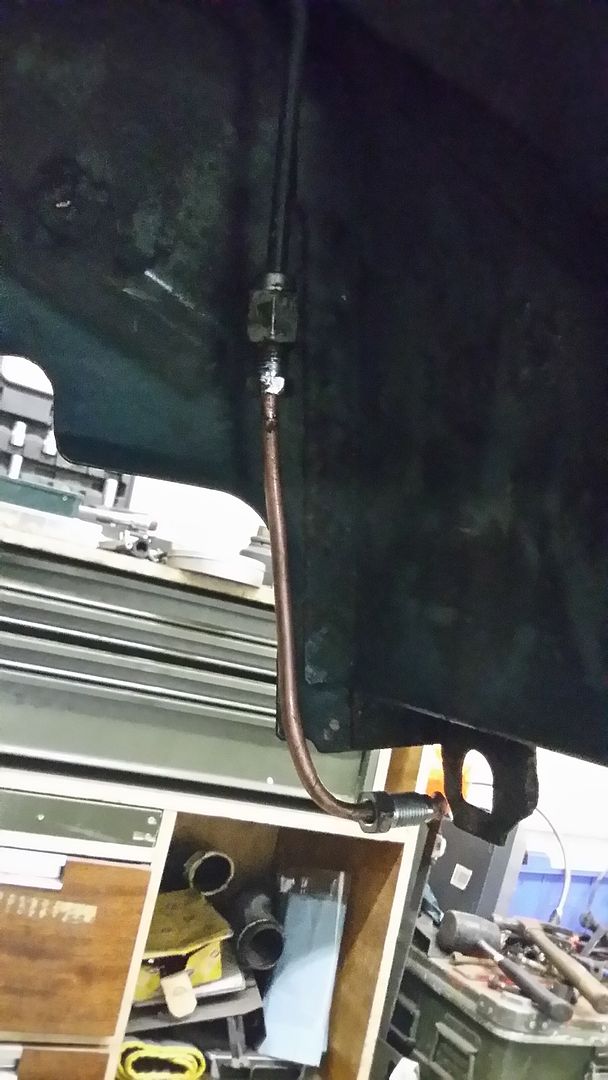
A few more little jobs done today, including removing O/S rear brake line and repairing it after it failed whilst trying to removed the OE flexi in prep for fitting the HEL lines with 1/8th npt fitting.
Re: TF Race Car Build
Posted: Wed May 04, 2016 5:54 pm
by Rob Bell
Looking good

Re: TF Race Car Build
Posted: Sun May 08, 2016 7:20 am
by flyingbanana
Re: TF Race Car Build
Posted: Sun May 08, 2016 5:56 pm
by flyingbanana
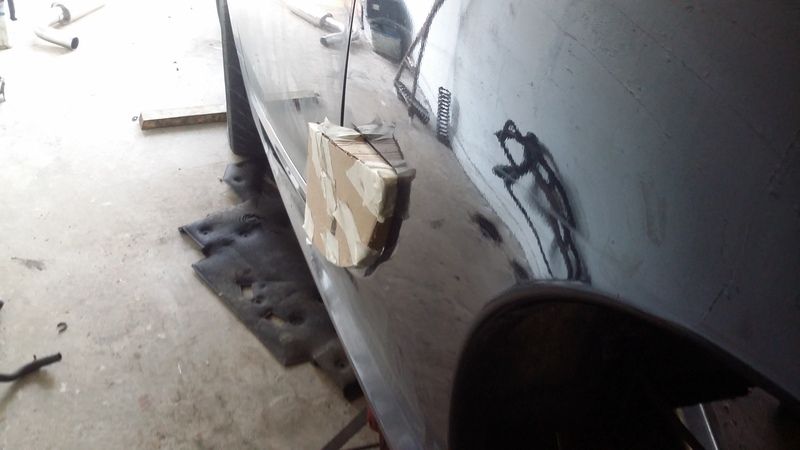
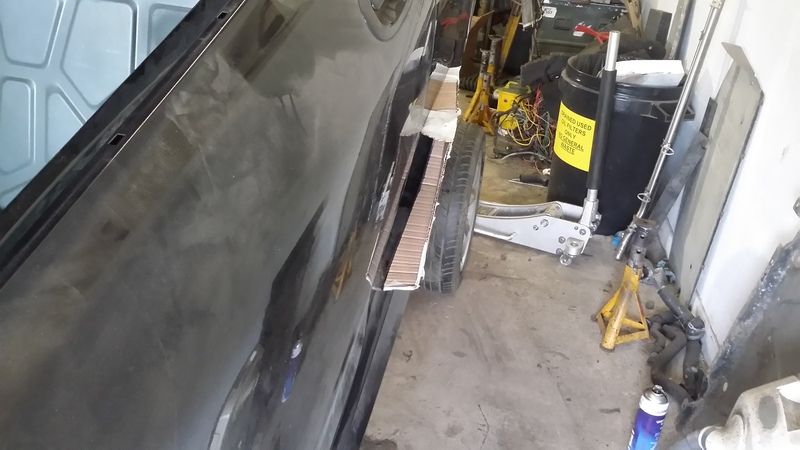
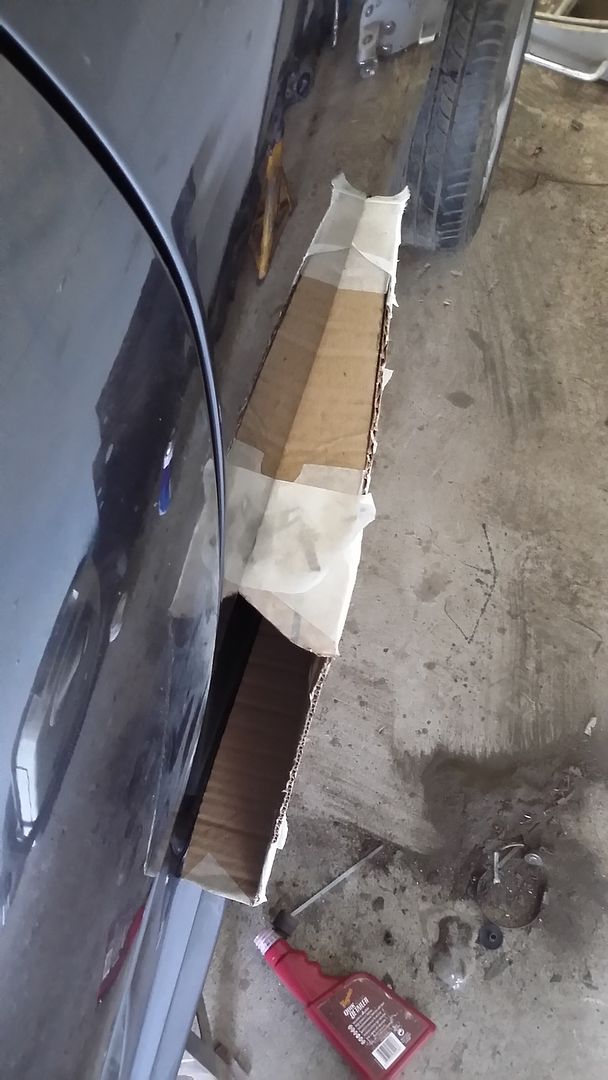
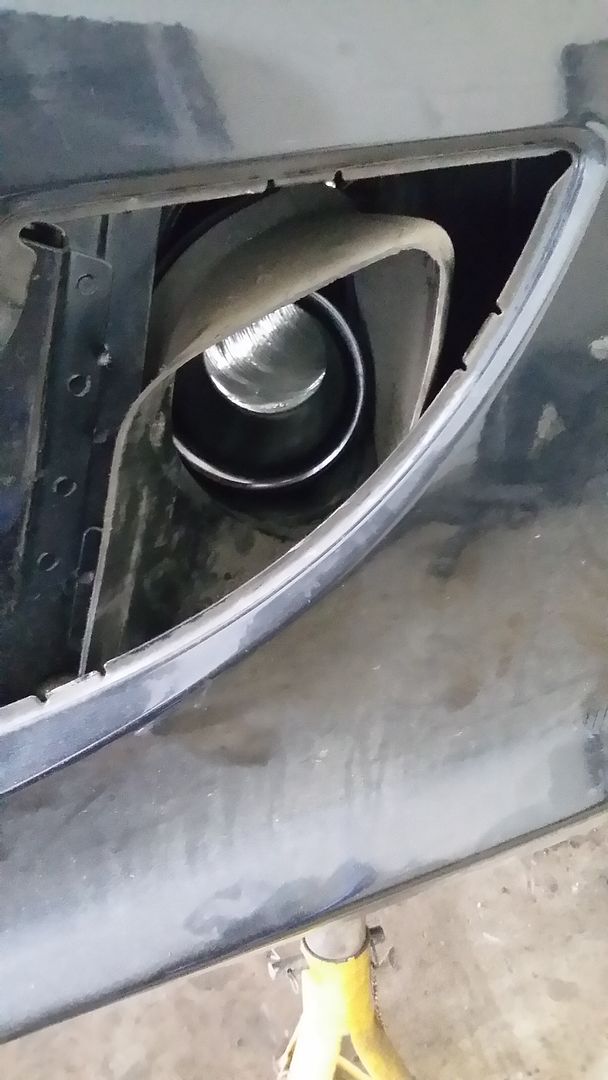
So tried the intakes on the car.
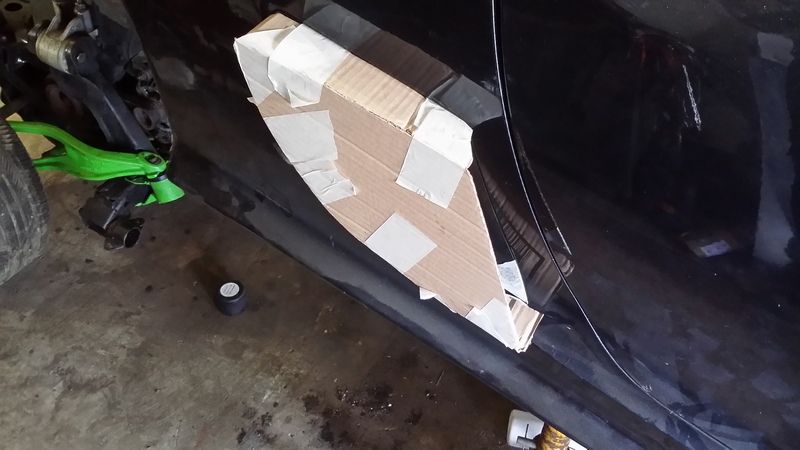
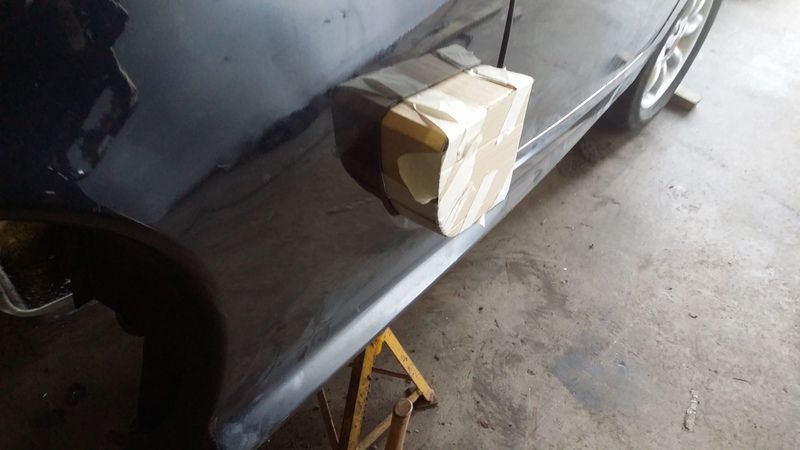
Won't be using this one.
Think I'll be using the trimmed one.
Oh and I've got the engine ready to go back in - it would be in now but I'm waiting on another full length clutch line to runthrough the inside of the car fm HEL, I asked for the wrong size banjo

.
Re: TF Race Car Build
Posted: Mon May 09, 2016 10:05 am
by Rob Bell
I think the trimmed version certainly looks better, and should work fine. Are you using the cardboard as a GRP shaper?
Re: TF Race Car Build
Posted: Mon May 09, 2016 1:05 pm
by flyingbanana
Rob Bell wrote:I think the trimmed version certainly looks better, and should work fine. Are you using the cardboard as a GRP shaper?
I'm either going to use the cardboard and coat with resin inside first then outside or get some modelling plastic sheet, not sure yet
Re: TF Race Car Build
Posted: Mon May 09, 2016 1:10 pm
by Rob Bell
Covering the card with gaffer tape seems a good idea: the gel coat detaches from this reasonably easily looking at various Youtube tutorials in the past...
Re: TF Race Car Build
Posted: Mon May 09, 2016 3:26 pm
by flyingbanana
Rob Bell wrote:Covering the card with gaffer tape seems a good idea: the gel coat detaches from this reasonably easily looking at various Youtube tutorials in the past...
Hmm, might try sticky back plastic in true Blue Peter traditions. That way there won't be any lines between strips that need sanding down

I'm going to mount them like the elise ones are rather than bonding them.
Re: TF Race Car Build
Posted: Mon May 09, 2016 4:34 pm
by flyingbanana
Clutch line has arrived and the wheels are in paint at the moment so they could be here this week

Re: TF Race Car Build
Posted: Tue May 10, 2016 1:35 pm
by flyingbanana
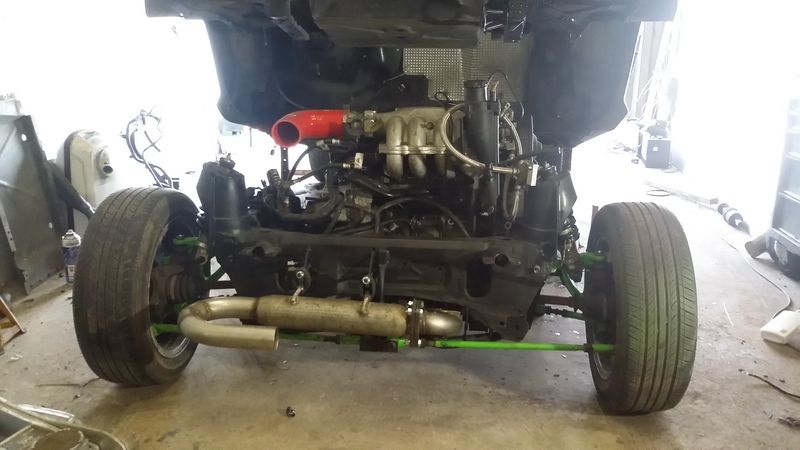
Productive dinner time - engine back in
Re: TF Race Car Build
Posted: Tue May 10, 2016 3:23 pm
by Rob Bell
Looking like a car again
Re: TF Race Car Build
Posted: Mon May 16, 2016 6:47 pm
by flyingbanana
Re: TF Race Car Build
Posted: Mon May 16, 2016 9:47 pm
by flyingbanana
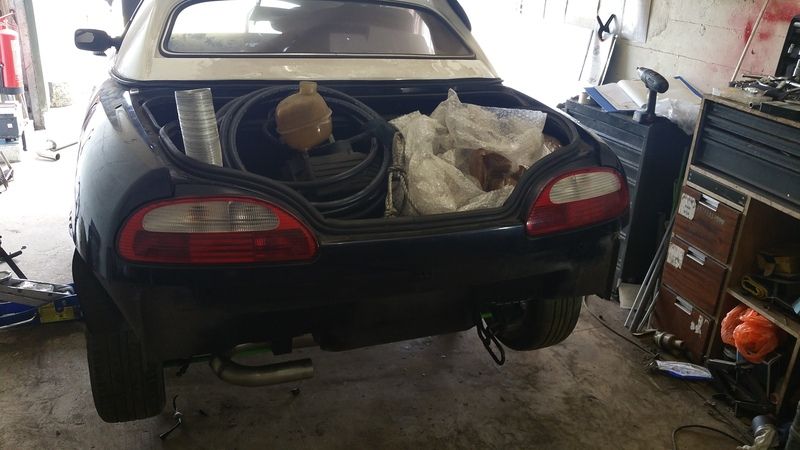
Did a bit of work on relocating the air box to the boot this afternoon.
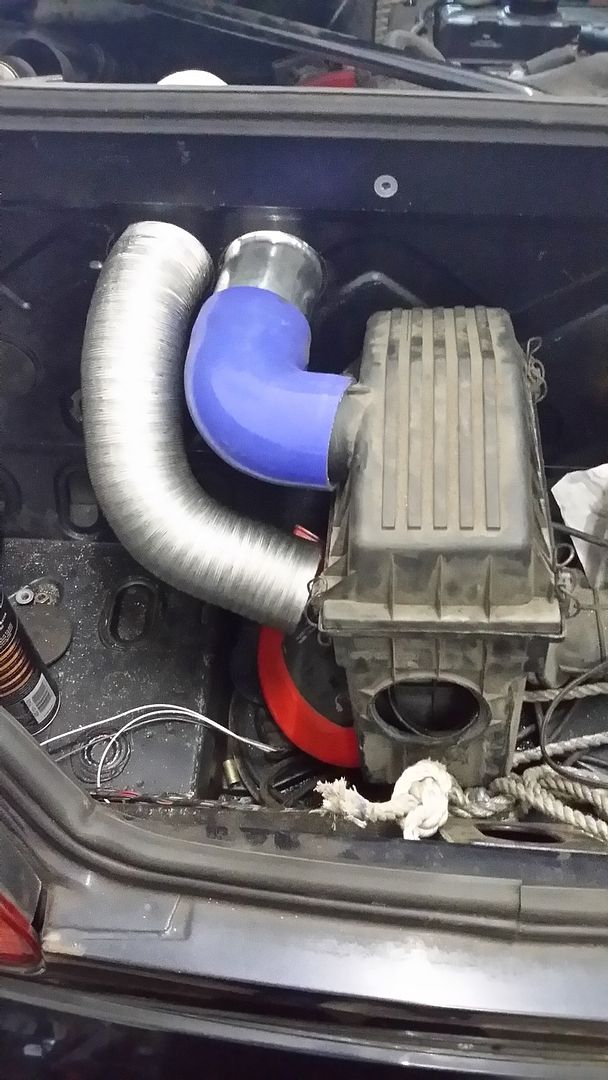
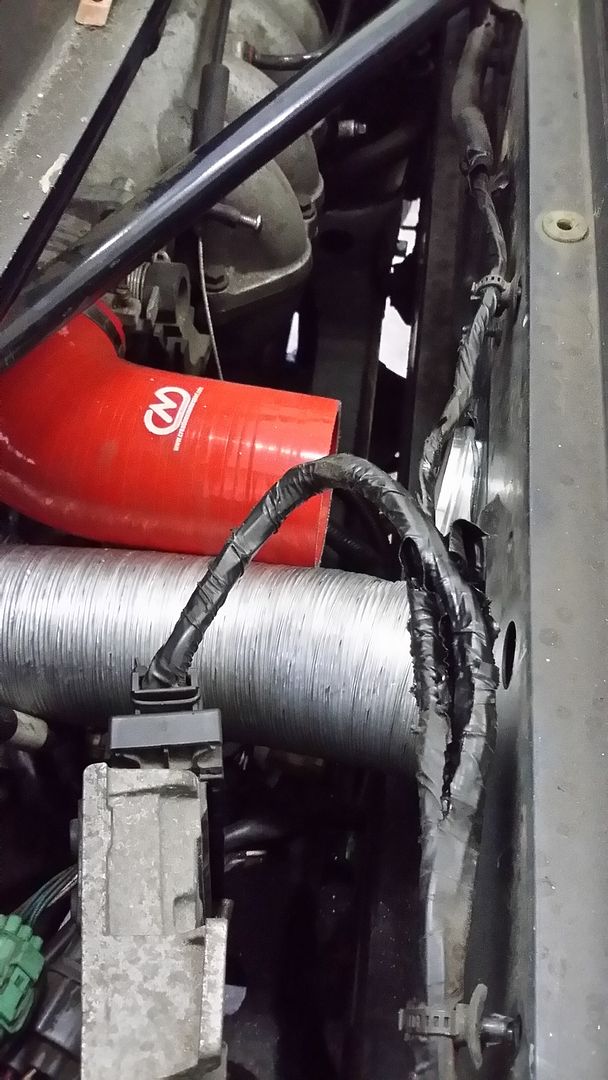
I am also relocating the header tank and FPR to the boot as well.
Re: TF Race Car Build
Posted: Tue May 17, 2016 2:38 pm
by Rob Bell
That'll make filter changes easier for sure. Knowing that you'll have given this a lot of thought, just wondering why:
1. why the need to relocate the airbox into the boot?
2. why retain the standard air box, when the ITG Maxogen flows better and will release a couple more horses?
I can think of a couple of reasons, but they may not be the same as yours!!!

Re: TF Race Car Build
Posted: Tue May 17, 2016 3:15 pm
by flyingbanana
Rob Bell wrote:That'll make filter changes easier for sure. Knowing that you'll have given this a lot of thought, just wondering why:
1. why the need to relocate the airbox into the boot?
More space in the engine bay making access easier.
Remove filter housing from hot engine bay.
Easier access to filter.
Better airflow around engine bay - less obstructions
2. why retain the standard air box, when the ITG Maxogen flows better and will release a couple more horses?
Cost
I can think of a couple of reasons, but they may not be the same as yours!!!
I have to ask how does the ITG flow better than standard air box with ITG panel filter?
Re: TF Race Car Build
Posted: Tue May 17, 2016 6:09 pm
by Rob Bell
Yup, the reduced heat soak must be an advantage
I agree with you on cost grounds - Project Shed runs a standard airbox too for the same reason. It's a case of diminishing returns! But the ITG Maxogen has a very cleverly designed housing that does seem to liberate a couple of additional BHP. I managed to moreorless duplicate it by using an old Rover 800 airbox, but the maxogen still manages to get a couple more horses on the RR than this arrangement (see
http://mgf.ultimatemg.com/group2/airbox ... us_itg.htm). But the old Rover airbox cost me about a fiver. A maxogen costs 70 times more... I didn't think it worth it either.
Re: TF Race Car Build
Posted: Wed May 18, 2016 8:27 pm
by flyingbanana
Looks quite good - take it it is on Shed?
Re: TF Race Car Build
Posted: Thu May 19, 2016 1:12 pm
by Rob Bell
Nope, it's on my other F.
The Shed is using its original airbox, but with the cold intake rigged up in a similar way to yours. Once I have it converted to MEMS3, it'll be fitted with a brace of Suzuki GSXR throttle bodies along with a hotter cam
Re: TF Race Car Build
Posted: Fri Jun 03, 2016 10:49 pm
by flyingbanana
Re: TF Race Car Build
Posted: Sat Jun 04, 2016 7:12 pm
by flyingbanana
Well I can now open the door from the inside
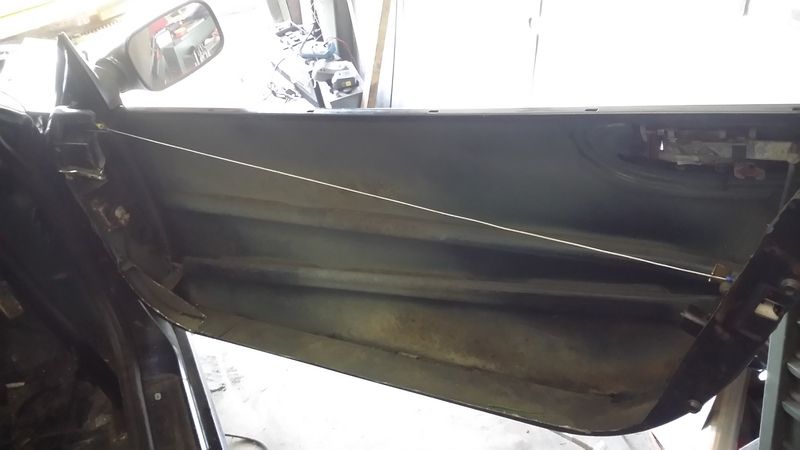
and I've finally decided where to mount the switch panel
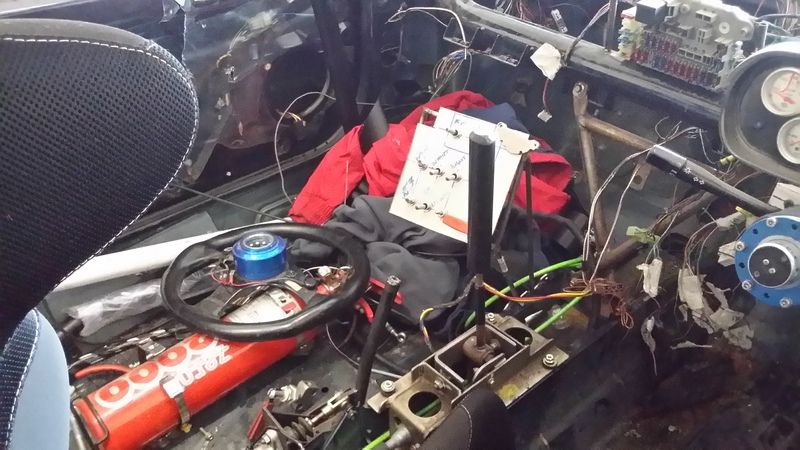
other than that not a very productive day.


