Resto project: N7
Moderator: Committee Members
-
Rob Bell

- Committee Member
- Posts: 14438
- Joined: Tue Oct 02, 2007 2:36 pm
- MGF Register Region: South East
- Model of Car: MGF 1.8i + MGF Shed!
Re: Resto project: N7
The rear of the car has a few problems - those bumper crush cans need replacing because the bumper mounts have been ripped out (thanks corrosion):
I put some smoothrite on the external corrosion for now to prevent further rusting:
Rear panel doesn't look too good, with some unsightly dents...
... and unsightly surface rust bubbling under paint. I've sanded it off, and given it a light coat of smoothrite for now.
And similarly below:
Not going to win a concours event any time soon eh?
-
Rob Bell
- Committee Member
- Posts: 14438
- Joined: Tue Oct 02, 2007 2:36 pm
- MGF Register Region: South East
- Model of Car: MGF 1.8i + MGF Shed!
Re: Resto project: N7
The radiator at the front is ducted - but clearly had suffered an impact as it was quite distorted the alloy. I've straightened this up, and re-riveted the popped fastenings. There's a missing panel that I have now replaced, and it needs a coat of paint to tidy up.
-
Rob Bell
- Committee Member
- Posts: 14438
- Joined: Tue Oct 02, 2007 2:36 pm
- MGF Register Region: South East
- Model of Car: MGF 1.8i + MGF Shed!
Re: Resto project: N7
Oh... here's the worst bit. I've already tidied this up, but here's a picture of the outrigger perforating rust on the offside; the nearside is only slightly better 
Some serious welding repairs needed here.
But the sills are solid! They've been re-welded previously
But the sills are solid! They've been re-welded previously
-
Rob Bell
- Committee Member
- Posts: 14438
- Joined: Tue Oct 02, 2007 2:36 pm
- MGF Register Region: South East
- Model of Car: MGF 1.8i + MGF Shed!
Re: Resto project: N7
I mentioned that previously I had not picked up the rear drive shafts? I have these now (thanks Charles) - but before then I comtemplated fitting after-market reluctor rings to the drive spindle/ CV outer. I think these ought to be similar to the fronts - but strangely, there aren't many aftermarket options for these - and there appears to be some confusion regarding the number of teeth on the rings. There are 42 on the front hubs and you'll see 43-tooth rings being sold for the MGF/TF.
Looking at the ABS and non-ABS hubs, it looks like the non-ABS may not be suitable: they have different shapes - as these two catalogue pictures show:
ABS:
Non-ABS:
Better just to fit the ABS drive shafts!!!
Looking at the ABS and non-ABS hubs, it looks like the non-ABS may not be suitable: they have different shapes - as these two catalogue pictures show:
ABS:
-
Rob Bell
- Committee Member
- Posts: 14438
- Joined: Tue Oct 02, 2007 2:36 pm
- MGF Register Region: South East
- Model of Car: MGF 1.8i + MGF Shed!
Re: Resto project: N7
When I removed the crumpled front NS wing, inevitably, one of the fastenings sheared off. Despite best efforts, I just couldn't get the remnant out, so resorted to drilling and re-tapping for a new retaining screw. All fun and games...
-
Rob Bell
- Committee Member
- Posts: 14438
- Joined: Tue Oct 02, 2007 2:36 pm
- MGF Register Region: South East
- Model of Car: MGF 1.8i + MGF Shed!
Re: Resto project: N7
Coming more up to date, it was time to fit the reconditioned hydragas spheres and replace the original hub/ uprights with the re-painted ABS versions:
To change the spheres, you really don't need to remove the uprights, but getting to the retaining screws, nuts and bolts, it really is necessary to remove the damper. Interestingly on both sides of the car, the upper front hydragas retaining plate nut and bolt had severe corrosion and needed replacement. The other three fastenings were absolutely fine. Strange...
Looks good now - note that the ABS cable brackets that had been acid washed are now nicely painted, and almost looks factory! (Well, almost! )
)
Looks good now - note that the ABS cable brackets that had been acid washed are now nicely painted, and almost looks factory! (Well, almost!
-
Rob Bell
- Committee Member
- Posts: 14438
- Joined: Tue Oct 02, 2007 2:36 pm
- MGF Register Region: South East
- Model of Car: MGF 1.8i + MGF Shed!
Re: Resto project: N7
Slight tangent, I have been experimenting with a engine-turned silver wrap for the door trims.
Unfortunately, it has not gone well through (a) my lack of skill and experience with wrapping stuff in vinyl and (b) the lack of stretch of this "3D" effect wrap.
Looks okay-ish from a distance:
But close up it is a mess:
Back to drawing board with this one I think... 
Unfortunately, it has not gone well through (a) my lack of skill and experience with wrapping stuff in vinyl and (b) the lack of stretch of this "3D" effect wrap.
Looks okay-ish from a distance:
-
Rob Bell
- Committee Member
- Posts: 14438
- Joined: Tue Oct 02, 2007 2:36 pm
- MGF Register Region: South East
- Model of Car: MGF 1.8i + MGF Shed!
Re: Resto project: N7
And finally, the drive shaft seals! Yes, I forgot to drain the gearbox before pulling the drive shaft. But the gearbox is now drained... (into multiple takeaway boxes!)
I haven't seen many useful pictures of what the two types of seal look like (and not of any in situ). Here's the driver's side (RH) seal, with the drive shaft removed. You are looking straight into the differential here by the way...
I've got both types on order, so will post comparison images of what the workshop manual unhelpfully refers to as "Type A" and "Type B".
What you see here, for reference, is an early type seal (Type A), part number UNG100060. Later versions (Type B) are TRX100100 (from memory!)
Despite the difference in seals, you can use later drive shafts in early gearboxes, and vice versa - as you can see, the differential end of the drive shafts are identical:
The one closest, came from my 1995 build MGF, the one further away, from a much more recent TF (vintage unknown).
Here is the rear wheel well, rear hub/upright removed, drive shaft removed, damper removed. Almost ready to remove the hydragas sphere - except I need to make my patented modification to the wheel arch - an access hole to the rearmost upper hydragas retaining plate fastener. Here I used a 12mm hole cutter to get access for my 1/2" socket extension. Makes the job MUCH easier!
Having removed the hydragas spheres, I had to remove and swap over the displacer cones. My car is lowered the "Tech-speed way" - which, as you can see, involved shortening the length of the cone. Swapping these over is a real chore, but do-able...
This is the length of the original cone below the skirt:
And this is the length of the Tech-speed modified version:
A good 10mm shorter!
The rear sphere on the driver's side is now back in place. I am waiting for the differential seals to arrive before reassembling.
Getting there!!!
I've got both types on order, so will post comparison images of what the workshop manual unhelpfully refers to as "Type A" and "Type B".
What you see here, for reference, is an early type seal (Type A), part number UNG100060. Later versions (Type B) are TRX100100 (from memory!)
Despite the difference in seals, you can use later drive shafts in early gearboxes, and vice versa - as you can see, the differential end of the drive shafts are identical:
Here is the rear wheel well, rear hub/upright removed, drive shaft removed, damper removed. Almost ready to remove the hydragas sphere - except I need to make my patented modification to the wheel arch - an access hole to the rearmost upper hydragas retaining plate fastener. Here I used a 12mm hole cutter to get access for my 1/2" socket extension. Makes the job MUCH easier!
The rear sphere on the driver's side is now back in place. I am waiting for the differential seals to arrive before reassembling.
Getting there!!!
-
Rob Bell
- Committee Member
- Posts: 14438
- Joined: Tue Oct 02, 2007 2:36 pm
- MGF Register Region: South East
- Model of Car: MGF 1.8i + MGF Shed!
Re: Resto project: N7
Not being allowed to go anywhere has meant more work on my MGF this weekend.
I didn't take pictures, but I've replaced the seized engine bay cooling fan (it needed painting and actually looked worse than the one on my car originally - but looks perfect now)
I also got this - the first time I've ever ordered a part for a Ford!!!
It's a remarkably good facsimile of the MG version of the airbag warning sticker that I could not find on line. Unfortuantely, I need to de-wax the dashboard where I cleaned it. Ford stickers are rubbish...
I have also now replaced the RH side differential driveshaft seal (see technical thread on details of this):
As described in other thread, it looks quite different from the later, so-called "Type-B" seal shown on the right. Replace your seal like-for-like. 
I also took the opportunity to take off the original rear bumper crush cans. These should have an L-shaped bracket to enable you to attach to the bumper in the rear exhaust apertures. Unfortunately the retaining screws invariably seize in their captive nuts, shearing off the brackets from the crush cans... this had happened to mine some while ago. Now is the time to sort these out with a pair of semi-decent second hand versions that I painted to make look presentable...
However, removing the crush cans revealed YET MORE PERFORATING RUST!!!! AAAAGGGGGHHHHH!
The problem, I think, stems from an accident over 20 years ago, when I was rear ended in stationary traffic at a traffic light. The Saab and Mercedes behind me were written off, and my car was bumped into a Honda in front. The boot was stoved in. The accident repair shop must have replaced rear panels, including (and especially?) the boot floor. The seam sealer they used appears to have completely failed with age - hence the emerging rust everywhere in a pattern that I've never seen on an MGF or TF before.
Should I get compensation??? I guess not: 20 years for an accident repair is probably considered a "win"...
Back to suspension, with the OSR now all buttoned up, time to start on the other side.
Removing the displacer cone from the reconditioned unit revealed this discolouration:
This doesn't look like the usual aluminium oxidation (white). The thing it made me think of was dried hydragas fluid (as seen when one of my spheres failed previously):
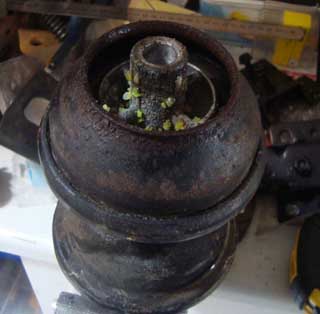
Is this replacement sphere faulty? Only thing against it being a fluid seal failure being that there is no discernable discolouration/marking on the dust seal... I'll drop Ian a line, but will probably try this one out and see whether there is any loss of ride height over time...
I didn't take pictures, but I've replaced the seized engine bay cooling fan (it needed painting and actually looked worse than the one on my car originally - but looks perfect now
I also got this - the first time I've ever ordered a part for a Ford!!!
I have also now replaced the RH side differential driveshaft seal (see technical thread on details of this):
I also took the opportunity to take off the original rear bumper crush cans. These should have an L-shaped bracket to enable you to attach to the bumper in the rear exhaust apertures. Unfortunately the retaining screws invariably seize in their captive nuts, shearing off the brackets from the crush cans... this had happened to mine some while ago. Now is the time to sort these out with a pair of semi-decent second hand versions that I painted to make look presentable...
Should I get compensation???
Back to suspension, with the OSR now all buttoned up, time to start on the other side.
Removing the displacer cone from the reconditioned unit revealed this discolouration:
Is this replacement sphere faulty? Only thing against it being a fluid seal failure being that there is no discernable discolouration/marking on the dust seal... I'll drop Ian a line, but will probably try this one out and see whether there is any loss of ride height over time...
-
Rob Bell
- Committee Member
- Posts: 14438
- Joined: Tue Oct 02, 2007 2:36 pm
- MGF Register Region: South East
- Model of Car: MGF 1.8i + MGF Shed!
Re: Resto project: N7
I've heard back from Dawn and Ian. They pressure test each sphere to 500psi and reckon you sometimes do see a yellow discolouration. If a sphere has failed, then as my picture above shows, it is a usually a crystalline deposit rather than the powdery residue on this displacer.
I'm feeling reassured (and very happy with the speed of Dawn's response to my question), so will be fitting this to N7 very shortly - which will complete the hydragas sphere replacement part of the task. Fitting the replacement ABS driveshaft and wheel hub/upright is currently waiting upon the arrival of the LH differential/driveshaft seal (TRX100060) towards the end of this week. Then it'll be brake pipe making time!!!
PS Dawn tells me that they will happily shave 10mm off your displacers if you want hydragas spheres with a lowered ride height. That'd have saved a bit of work, but never mind! Hopefully that may be useful information for anyone else looking to use Ian and Dawn's re-gas/reconditioning service (https://hydragasandhydrolasticservice.com/)
I'm feeling reassured (and very happy with the speed of Dawn's response to my question), so will be fitting this to N7 very shortly - which will complete the hydragas sphere replacement part of the task. Fitting the replacement ABS driveshaft and wheel hub/upright is currently waiting upon the arrival of the LH differential/driveshaft seal (TRX100060) towards the end of this week. Then it'll be brake pipe making time!!!
PS Dawn tells me that they will happily shave 10mm off your displacers if you want hydragas spheres with a lowered ride height. That'd have saved a bit of work, but never mind!
-
Rob Bell
- Committee Member
- Posts: 14438
- Joined: Tue Oct 02, 2007 2:36 pm
- MGF Register Region: South East
- Model of Car: MGF 1.8i + MGF Shed!
Re: Resto project: N7
A couple of update photos I've been meaning to upload.
First is the "completed" RH rear suspension re-fresh/ driveshaft + gearbox seal replacement/ ABS retrofit:
Note that I have not staked the driveshaft nut yet: I shall do this once the wheels are back on and the car is on the ground so I can get the nut up to the correct torque setting
The other is of the interior:
This is as much of the interior I want to fit at this stage as the car is going to paint. Ideally I would not have put any trim back in, but I haven't got the space to store all this stuff without damage - hopefully it will be kept in better condition in the car!
I have "BRM'd" the heater control panel - something I've wanted to do for ages. I wanted a genuine fascia panel, but these appear to be as rare as hens' teeth! This is actually an MGZR heater control fascia trim, wrapped in "3D" engine-turned effect vinyl. Brightens things up nicely - and hopefully makes some sense of what I was trying to achieve with the door trims posted earlier.
First is the "completed" RH rear suspension re-fresh/ driveshaft + gearbox seal replacement/ ABS retrofit:
The other is of the interior:
I have "BRM'd" the heater control panel - something I've wanted to do for ages. I wanted a genuine fascia panel, but these appear to be as rare as hens' teeth! This is actually an MGZR heater control fascia trim, wrapped in "3D" engine-turned effect vinyl. Brightens things up nicely - and hopefully makes some sense of what I was trying to achieve with the door trims posted earlier.
-
Ryan
- Posts: 56
- Joined: Thu Dec 09, 2010 1:24 am
- MGF Register Region: Canada
- Model of Car: MGF VVC
- Location: Halifax, Nova Scotia
Re: Resto project: N7
Great work so far. Really enjoying reading through this thread.
I think we’re at the point where a lot of earlier MGFs will now start to require significant work to keep them on the road for another 25 years. So as numbers of good ones reduce and values consequently go up, hopefully it will incentive owners to put work into their cars instead of selling or scrapping them.
I think we’re at the point where a lot of earlier MGFs will now start to require significant work to keep them on the road for another 25 years. So as numbers of good ones reduce and values consequently go up, hopefully it will incentive owners to put work into their cars instead of selling or scrapping them.
-
Rob Bell
- Committee Member
- Posts: 14438
- Joined: Tue Oct 02, 2007 2:36 pm
- MGF Register Region: South East
- Model of Car: MGF 1.8i + MGF Shed!
Re: Resto project: N7
Thanks Ryan - and yes, let's hope so. Too many cars have already been scrapped - but with the earliest cars now becoming eligible for import into the USA, that may help prices for good original cars.
My car will never be original of course!
My car will never be original of course!
-
Rob Bell
- Committee Member
- Posts: 14438
- Joined: Tue Oct 02, 2007 2:36 pm
- MGF Register Region: South East
- Model of Car: MGF 1.8i + MGF Shed!
Re: Resto project: N7
The LH drive shaft gearbox flange took some cleaning up, but I think I got a servicable result:
Here's the replacement seal - Land Rover OEM part, but appears identical to the Rover one I removed:
Putting it all back together went very smoothly - and now I have all four reconditioned Hydragas spheres fitted (with Tech-Speed lowered displacers), all four ABS hubs and uprights, two ABS drive shafts and the ABS sensors connected up to the main harness - and all looking nice and OEM.
One day, I may take out all the bolts and re-plate them, but for now, I've given them a layer of paint.
Next task is brakes.
I may revert to standard rotors and Lucas Girling calipers - this makes things easier to fit slave wheels for when the car goes off to the body shop. Or I may simply clean and re-fit what I have. One big problem though: I can't remove one of the VHS centre bore adaptors for the rear rotor. It is necessary to centre the disc on the hub. That may seal the decision in respect to the rear brakes!
I also have a hunch that the front AP calipers may be partially seized, but I am not sure I have a way of telling. Stick an airline in and see how the pistons move???
Advice welcomed!
-
mgtfnut

- Posts: 788
- Joined: Mon Oct 08, 2007 2:22 pm
- MGF Register Region: South Wales
- Model of Car: TF 135
- Location: Dinas Powys
Re: Resto project: N7
Rob, I've cut and pasted an old email from Mike Satur when the same problem with spacer rings happened to me - worked.Rob Bell wrote: ↑Tue Jun 23, 2020 9:31 amI may revert to standard rotors and Lucas Girling calipers - this makes things easier to fit slave wheels for when the car goes off to the body shop. Or I may simply clean and re-fit what I have. One big problem though: I can't remove one of the VHS centre bore adaptors for the rear rotor. It is necessary to centre the disc on the hub. That may seal the decision in respect to the rear brakes!
I also have a hunch that the front AP calipers may be partially seized, but I am not sure I have a way of telling. Stick an airline in and see how the pistons move???
Advice welcomed!
The 4 pot AP calipers have pistons which are easily pushed back - try a soft edged tool between the disc and pads (old screwdriver/ plastic door wedge?)
Also comments on his tubular front subframe idea !!
Jerry, I would make sure the locating screws are fitted and this should
be sufficient to centralise the discs.I haven't come across this problem
before but we don't fit this kit all that often in the shop and
therefore not noticed a change in manufacturing dimensions.
Regards Mike.
Jerry Herbert wrote:
> Hi again.
> I bought a big brake kit off you some time ago, and I'm passing it on
> to someone else.
> I've found that the aluminium spacer rings will not fit over a ridge
> on his TF front hubs, and I've bent one ring in my ignorance before
> realising there was a problem.
> Do you/can you supply two new rings? Have you come across different
> ridges in machined hubs for this conversion, as I had no problem on
> mine? The problem being that the ridge prevents the ring entering the
> central hole in the disc.
>
> Regards,
> Jerry
> Please note our new e-mail address:
> jerry-herbert@tiscali.co.uk
>
> ----- Original Message ----- From: "Mike Satur" <mike@mikesatur.com>
> To: "Jerry Herbert" <jerry-herbert@tiscali.co.uk>
> Sent: Monday, April 21, 2008 11:45 AM
> Subject: Re: TF front subframe
>
>
>>
>>
>>
>> Jerry at the mo it is still in development and I haven't got a date
>> as to when I will progress it.The day to day stuff seems to get in
>> the way!!
>> Regards Mike.
>> Jerry Herbert wrote:
>>
>>> Looking at some old stuff of yours prior to chucking it out, I
>>> spotted a few words about a tubular subframe.
>>> I'm currently trying to correct my strange camber settings, and
>>> would be interested if you have made any progress with it.
>>> Cheers,
>>> Jerry
>>> Please note our new e-mail address:
>>> jerry-herbert@tiscali.co.uk <mailto:jerry-herbert@tiscali.co.uk>
Jerry
MG TF 135 - 100k
Suzuki SJ 413 - 309k
Skoda Yeti SE 110 4x4 - 131k
MG TF 135 - 100k
Suzuki SJ 413 - 309k
Skoda Yeti SE 110 4x4 - 131k
-
Rob Bell
- Committee Member
- Posts: 14438
- Joined: Tue Oct 02, 2007 2:36 pm
- MGF Register Region: South East
- Model of Car: MGF 1.8i + MGF Shed!
Re: Resto project: N7
Thanks Jerry!
I'll clean up the front calipers - they need repainting, but if the pistons push back reasonably easily, I'll resist the temptation for a complete rebuild at the moment: there's been enough scope shift on this project already: this was only meant to be a quick tidy-up!
The spiggot rings are VHS and made of alloy. Not sure whether there's dissimilar metal corrosion or just old dried grease keeping the centralisation ring on? May try tapping with a soft-headed hammer, but may need to get Andy/Wayne/Allan to send me a replacement.
[There are two hub designs in circulation on MGF and perhaps too on TF: where the splined stub shaft arises off the CV, the shoulder is either radiused or stepped - VHS has two designs of spiggot adapters to adequately centralise their discs. May be that is why one of the Mike Satur rings did not fit correctly?]
The tubular subframe sounds like a really interesting idea - something I've dreamt of making myself. My hunch is that there wasn't enough of a business case for Mike to progress the idea, but if it were to come to fruition, I'd be interested (assuming weight/torsional stiffness benefits!)
-
mgtfnut
- Posts: 788
- Joined: Mon Oct 08, 2007 2:22 pm
- MGF Register Region: South Wales
- Model of Car: TF 135
- Location: Dinas Powys
Re: Resto project: N7
Thanks for providing this - had the car 16 years now and had a constant fiddle with water leaks both sides.
Things came blindingly obvious reading through the bulletin, had a go on the n/s today and we'll see what happens now
Jerry
MG TF 135 - 100k
Suzuki SJ 413 - 309k
Skoda Yeti SE 110 4x4 - 131k
MG TF 135 - 100k
Suzuki SJ 413 - 309k
Skoda Yeti SE 110 4x4 - 131k
-
Rob Bell
- Committee Member
- Posts: 14438
- Joined: Tue Oct 02, 2007 2:36 pm
- MGF Register Region: South East
- Model of Car: MGF 1.8i + MGF Shed!
Re: Resto project: N7
I've got most of the grime and tar-like substance off the front calipers, although they are far from perfect. What is also far from perfect is that the tomato-red paint on the calipers have been stone blasted back to bare alloy in places!
This shade doesn't go particularly well on a BRG car anyway, so a colour change is inevitable.
Question: black or traditional MG burgundy?
Question: black or traditional MG burgundy?
-
Rob Bell
- Committee Member
- Posts: 14438
- Joined: Tue Oct 02, 2007 2:36 pm
- MGF Register Region: South East
- Model of Car: MGF 1.8i + MGF Shed!
Re: Resto project: N7
PS the pad pins appear to be in good condition, as too are the pads (surprise!) The pistons push back fine, so I'll not be rebuilding them. Currently, I only plan to paint the outer, visible side of the caliper. Not sure whether this will sit well with my OCD - we shall see...
-
Rob Bell
- Committee Member
- Posts: 14438
- Joined: Tue Oct 02, 2007 2:36 pm
- MGF Register Region: South East
- Model of Car: MGF 1.8i + MGF Shed!
Re: Resto project: N7
In other news, I've noticed that the front crash bar is bent like a banana. Not really really badly, but bent nonetheless (easily seen if I put a straight edge against it). I have another bumper crash bar from Charles' spares car. It's straighter, but one of the crush brackets needs replacing.
Crushed crush "can":
These are pop-riveted on with the largest pop rivets I've ever seen! I'll probably bolt on the replacement...